Have you ever thought about what happens to your kitchen scraps and yard waste? If you’ve been curious about how you can turn those materials into something useful while also reducing waste, starting a compost bin at home is a fantastic way to do it! By doing so, you can not only create rich soil for your garden but also contribute positively to the environment. Let’s get started on this rewarding journey together!
What is Composting?
Composting is the natural process of recycling organic material, such as food scraps and yard waste, into a rich soil amendment known as compost. It’s like giving back to the earth what it gives you! This process uses microorganisms to break down organic matter into a nutrient-rich substance that can significantly improve soil structure, moisture retention, and plant health.
Why Should You Compost?
There are numerous benefits to composting, which extend beyond just creating healthy soil. Here are a few compelling reasons for starting a compost bin at home:
Waste Reduction
By composting, you significantly decrease the amount of waste that ends up in landfills. For example, did you know that food scraps can make up nearly 30% of what we throw away? Composting helps divert these materials from landfills, where they would otherwise decompose and produce harmful methane gas.
Environmental Benefits
Composting reduces greenhouse gas emissions and lowers your carbon footprint. By recycling organic waste, you help reduce the need for chemical fertilizers, which can harm local ecosystems.
Nutrient-Rich Soil
The finished compost can be added to your garden or potted plants, enriching the soil with valuable nutrients that promote healthy growth. You’ll love seeing how your plants thrive with this natural fertilizer!
Setting Up Your Compost Bin
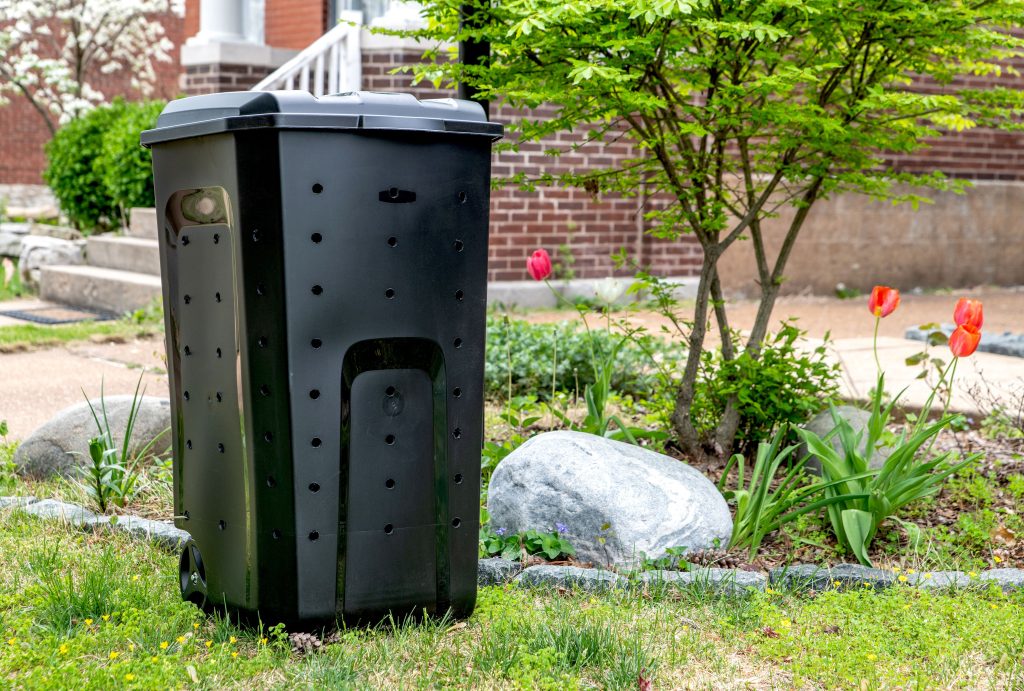
Deciding to compost is just the first step; you also need to consider how you’ll set up your compost bin. There are several options for composting bins, each with its unique advantages. Let’s explore the most common types.
Types of Compost Bins
| Compost Bin Type | Description | Pros | Cons |
|---|---|---|---|
| Open Pile | A simple and straightforward method. | Easy to set up, low cost. | Can be messy, may attract pests. |
| Wire Bin | Constructed with wire mesh, allowing airflow. | Good airflow and easy access. | Can be unattractive, limited volume. |
| Plastic Bin | Enclosed plastic bins available in various sizes. | Keeps things neat, and retains heat. | Higher cost, may require assembly. |
| Worm Bin | Uses worms to break down organic matter. | Quick composting, minimal odor. | Can be complex to set up, requires maintenance. |
Choosing the Right Location
Next, think about where you’d like to place your compost bin. Select a shaded area to maintain moisture levels while ensuring it’s easily accessible for adding materials and turning the pile. Ideally, you want it close to your kitchen so you can conveniently grab kitchen scraps for your compost.
Preparing the Bin
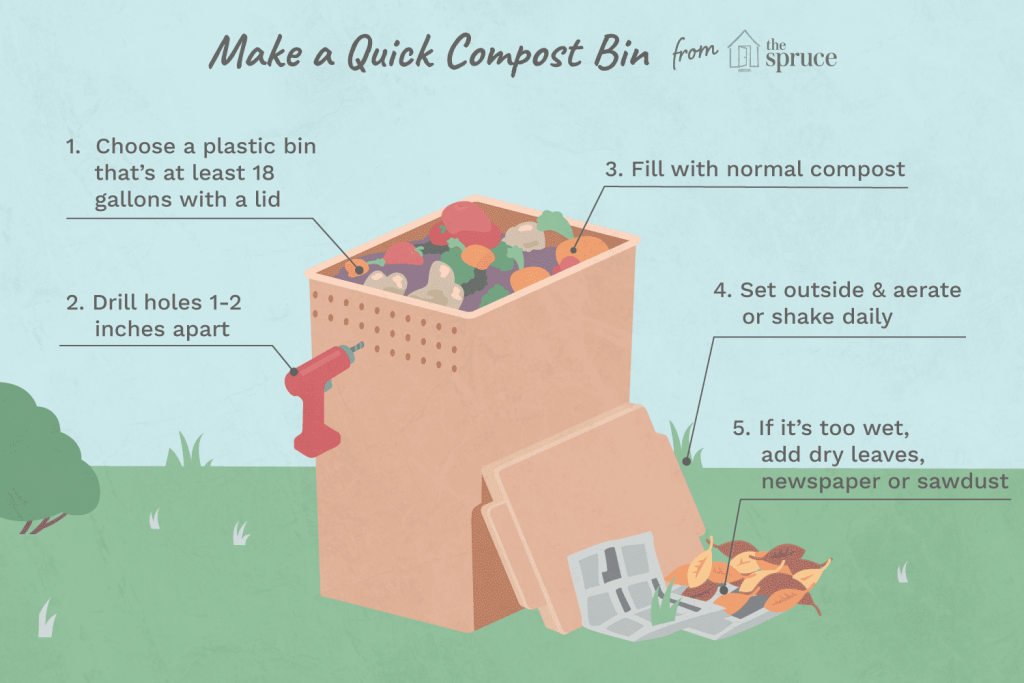
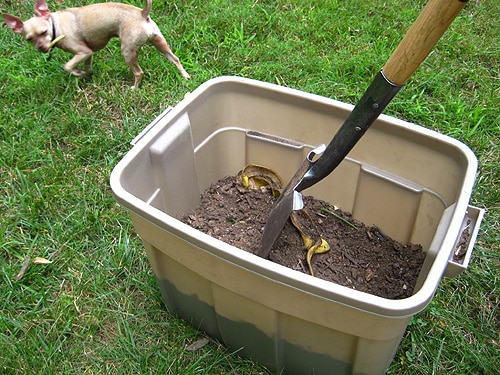
Once you’ve selected a type of compost bin and located it, it’s time to prepare it. If you choose an open pile, simply designate an area in your yard. For bins, make sure they have adequate airflow, which is crucial for aerobic bacteria to thrive. Drill small holes in the sides if needed, especially with plastic bins.
The Carbon to Nitrogen Ratio
A good compost pile needs a balance of carbon-rich “browns” and nitrogen-rich “greens.” Here’s an easy way to remember it:
- Browns: Dry leaves, straw, sawdust, and cardboard (high in carbon).
- Greens: Kitchen scraps, grass clippings, and plant material (high in nitrogen).
The ideal ratio is about 30 parts carbon to 1 part nitrogen. You don’t need to be exact, but try to keep this balance in mind to optimize your composting process.
What to Compost
Understanding what can and cannot go into your compost bin is essential for achieving a successful compost. Here’s a handy list to guide you.
Compostable Materials
- Kitchen Scraps: Fruit and vegetable peelings, coffee grounds, eggshells, and grains.
- Aged Manure: From herbivores like cows, horses, sheep, or chickens.
- Yard Waste: Grass clippings, leaves, and small branches.
- Browns: Shredded newspaper, dried leaves, and cardboard.
Non-Compostable Materials
| Item | Reason |
|---|---|
| Meat or Dairy | Attracts pests and produces odors. |
| Oil or Fat | Difficult to break down and can create smell. |
| Diseased Plants | Can spread diseases to your garden. |
| Weeds with Seeds | Seeds may survive and spread when compost is used. |
Make sure to think carefully about what you add to the compost bin. The wrong items can lead to odor problems or attract unwanted pests.
Building Your Compost Pile
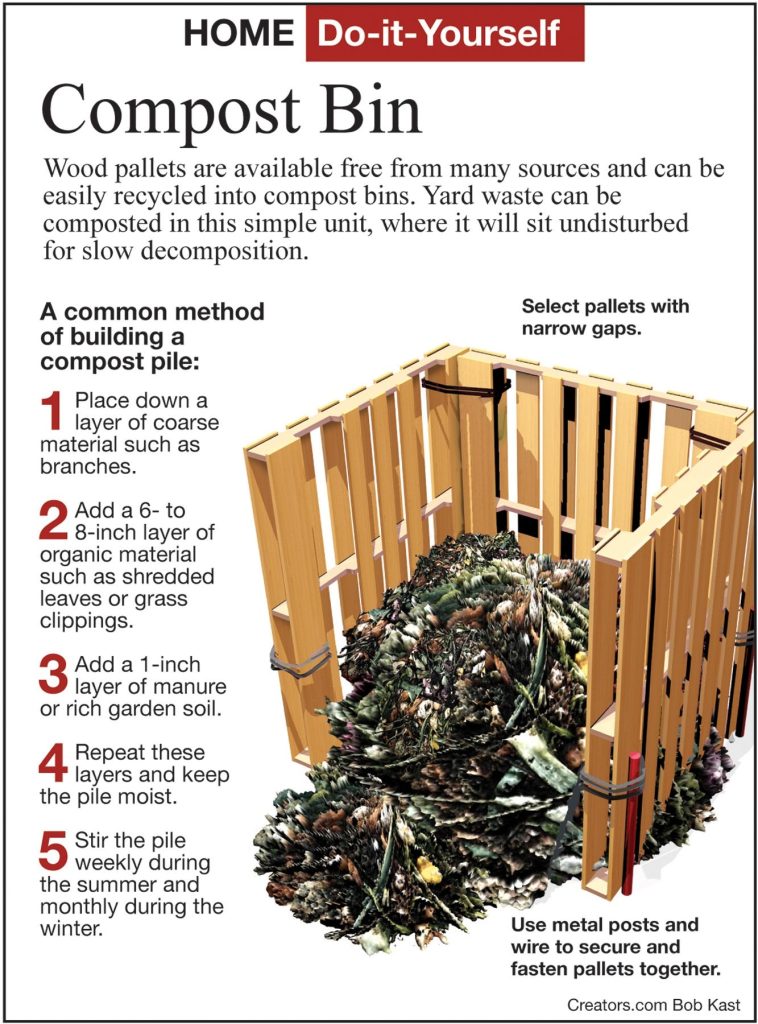
Now that you know what to include, let’s build your compost pile! Here’s how to layer your compost to ensure optimal decomposition:
Layering Your Compost
- Start with Browns: Begin with a layer of carbon-rich materials like dry leaves or shredded cardboard. This helps with airflow at the bottom of the pile.
- Add Greens: Next, add a layer of nitrogen-rich materials like vegetable scraps or grass clippings.
- Repeat Layers: Alternate between brown and green layers until your bin is full, aiming for a height of about three feet.
- Moisten: Lightly sprinkle water as you layer, but avoid soaking. Your compost should be moist, but not drenched.
Maintaining Your Compost
Creating a compost bin is just the beginning; maintaining it is critical for its success. Here are some essential tips to keep your compost healthy and efficient.
Turn Your Pile
Regularly turning your compost pile introduces oxygen, which is essential for aerobic decomposition. Aim to turn it every few weeks, or more often if it’s large. Use a pitchfork or shovel for this task. You’ll notice the pile heat up as the microbial activity increases, which is a sign that the compost is progressing!
Monitor Moisture Levels
The moisture level of your compost should be similar to a damp sponge. If it feels too dry, add some water; if it’s too wet, add more browns to absorb excess moisture. Regular checks will help keep everything balanced.
Check for Odors
Your compost should have an earthy smell. If you smell anything unpleasant, it can indicate that the pile is too compacted or not getting enough air. Turn the pile and consider adding more browns to help with aeration.
Harvesting Compost
After several months, your compost will break down into a dark, crumbly substance that’s ready to use. This process can take anywhere from two months to a year, depending on various factors like the materials you used and how often you maintained the pile. Here’s how you can tell when it’s ready:
Signs Your Compost is Ready
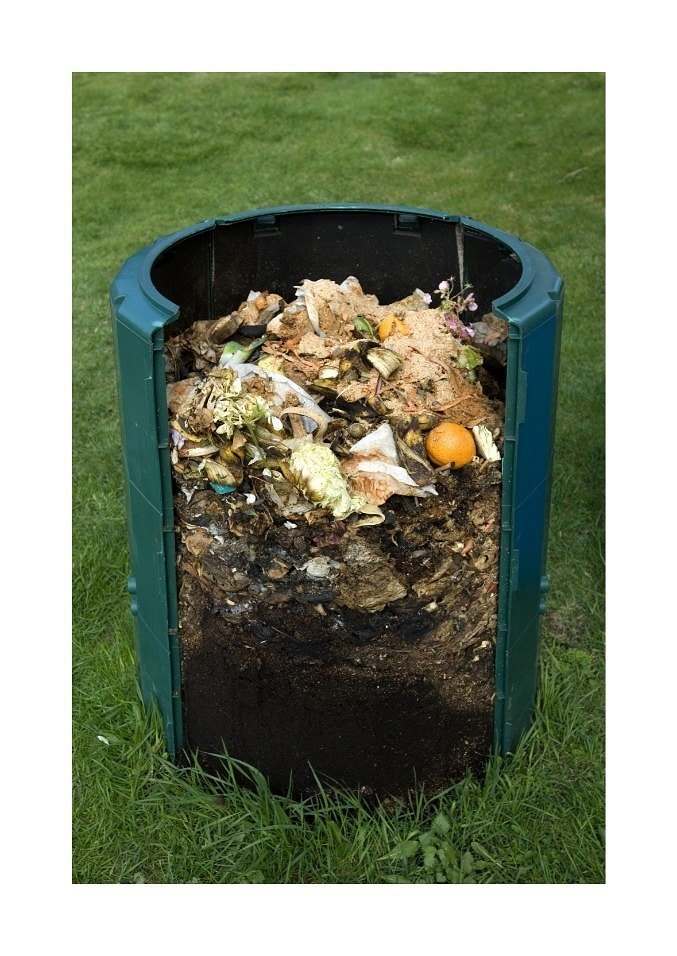
- Dark Color: The compost should look dark and rich, resembling the soil.
- No Distinct Material: Original materials should be unrecognizable after decomposition.
- Earthy Smell: A pleasant smell means the compost is ready to nourish your plants.
How to Harvest
When your compost is ready, simply remove it from the bottom of your bin or turn it out onto a tarp. You can sift through it to remove any remaining large chunks of material. These can be returned to the compost bin for further breakdown.
Using Compost in Your Garden
Now that you’ve harvested your compost, it’s time to put it to good use! Your homemade compost can be applied in many ways to benefit your garden and outdoor spaces.
Soil Amendment
Mix compost into your garden soil to improve its structure, drainage, and nutrient content. This will create a healthier environment for your plants to grow.
Mulching
Spread a layer of compost on the surface of your garden beds as mulch. This not only enriches the soil but also helps retain moisture and suppress weeds.
Fertilizer Substitute
Compost can replace synthetic fertilizers, providing your plants with all the nutrients they need in a slow-release form. This method promotes healthier plant growth and reduces chemical runoff into the environment.
Troubleshooting Common Compost Issues
Even with careful attention, you may sometimes encounter challenges with your compost bin. Here are a few common issues and how to resolve them:
Odor Problems
If your compost smells, it might be due to over-watering or too many nitrogen-rich materials. To fix this, turn the pile to aerate it and add more dry materials.
Pests
If animals are invading your compost bin, it might be due to food scraps that were not buried. Make sure to cover any food waste with brown materials and secure your compost bin as needed.
Slow Decomposition
If your compost is not breaking down quickly enough, it may be too dry or not turned frequently enough. Check moisture levels and turn the pile regularly to promote aeration.
Composting in Small Spaces
Don’t worry if you don’t have a large yard; composting is possible even in small spaces! Here are a couple of options for compact composting.
Bokashi Composting
This method involves fermenting kitchen scraps with beneficial microorganisms. It’s an excellent choice for those living in apartments since it doesn’t require much space and keeps odors to a minimum.
Indoor Worm Composting
Worm bins can be set up in small containers and kept indoors. Red wigglers are the best type of worms to use and can consume kitchen scraps quickly. This option is odorless and makes wonderful compost!
Final Thoughts
Starting a compost bin at home is a fantastic way to contribute to your garden and the environment. You’ll reduce waste, generate nutrient-rich compost, and possibly pick up a few gardening skills along the way. Remember: it’s a simple process that gets easier with practice.
As you begin this journey, take your time, observe the composting process, and adjust your approach as needed. Every small effort counts toward making a positive impact on our planet! So grab those kitchen scraps and get started with composting—your garden will thank you!